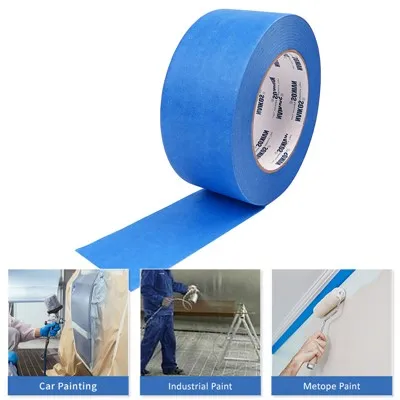
In home renovations or DIY projects, one of the most satisfying moments is peeling off the tape and seeing that laser-cut, perfectly straight edge of paint. However, many beginners often encounter the embarrassment of paint bleeding or peeling off the primer along with the tape. As tape application experts, we'll teach you how to create perfect straight lines using blue masking tape like a professional decorator through the following four core steps.
Surface Preparation: The Cornerstone of Success
"Why isn't my masking tape sticking?" The answer often lies in cleanliness.
Dusting: Wipe the work area with a microfiber damp cloth. Even invisible dust can reduce the initial tack of the blue tape.
Drying: Ensure the surface is completely dry. Moisture is the enemy of pressure-sensitive adhesive (PSA).
Primer Condition: If it's a freshly painted wall, be sure to wait at least 24 hours before applying the tape. For sensitive surfaces, please choose the "low viscosity" version of blue tape.
Application Techniques: Long Segment Positioning Method
Avoid short strips of tape, as multiple breaks increase the risk of jagged edges.
Stretch the Line: Hold the roll in one hand and pull out a 30-50 cm long segment with the other, maintaining tension. Align with the marked line and press firmly.
Overlap: At the tape joint, ensure an overlap of about 1 cm and press the seam firmly with your fingernail.
The Secret Weapon: Sealing the Edges
This is the key step that distinguishes amateurs from experts.
Physical Sealing: Press hard along the tape's edge with a wooden strip or plastic scraper after applying the tape. Blue masking tape frequently features a micro-wrinkled backing; applying pressure causes the adhesive to activate, enabling it to pierce the roughness of the wall.
Foundation Color Sealing Method (Advanced for Experts): To get the best result, paint the tape's edge with a layer of wall foundation paint first. In this manner, the space will be perfectly sealed even if there is some leakage because the paint that seeps in will be the same color. Apply a contrasting color once the base coat has dried.
When to Remove the Tape?
"Should I wait until the paint is completely dry before removing it?" is the question that people ask the most.
The conventional response is that the best results are obtained when the tape is "semi-dry"-that is, when it is no longer sticky to the touch but the film hasn't completely set.
Angle: Retrace slowly and steadily at a 45- to 90-degree angle.
If the paint is totally dry, carefully cut along the tape's edge with a utility knife to separate the paint film; if you tear it off, a lot of paint may peel off.
Why choose blue masking tape instead of regular paper tape?
| Features | Blue Masking Tape | Regular White Tape |
| UV Resistance | Extremely Strong (can withstand sunlight for 14 days) | Very Weak (easily cracks after sun exposure) |
| Clean Removal | Leaves no residue, does not damage primer | Leaves residue, difficult to remove |
| Impregnation | Specifically optimized for latex paint | Poorly textured paper allows paint to penetrate easily |
Frequently Asked Questions (FAQ) Quick Answers:
Q: How long can blue tape be left on a wall?
A: Most high-quality blue tape supports clean removal after 14 days. Beyond this period, the backing material may become brittle, making cleaning more difficult.
Q: Why did the tape peel off my wall paint?
A: Usually because the primer is not completely dry, or the wall surface itself has a powdery texture. It is recommended to perform a test adhesion in an inconspicuous area first.